creations must be using hybrid proprietary modeling software to make these.
Perhaps they are formed from complex D-SUB applications, but NURBS would be my first choice.
I give you a simplistic example on how to achieve a modern "sporty" shape commonly used on many bottles:
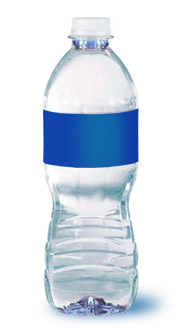
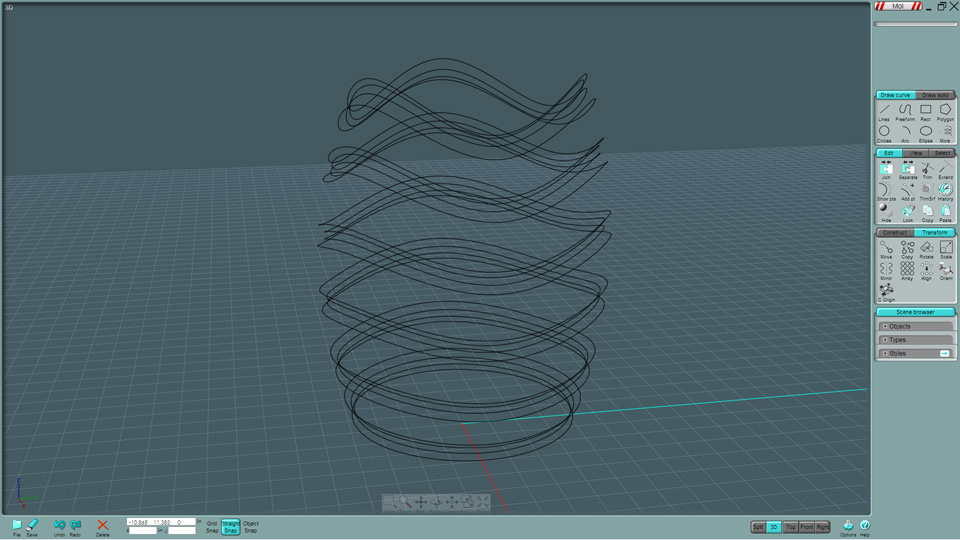
This bottle has fluted ridges that run horizontally up the bottle. There is an overall shape consisting of a rounded circular shape as the bottom portion and a cylinder shape up top.
The flutes undulate - start out flat and become more pronounced on up.
On top of that the indention detail is repeated in three directions axially on the bottle's surface.
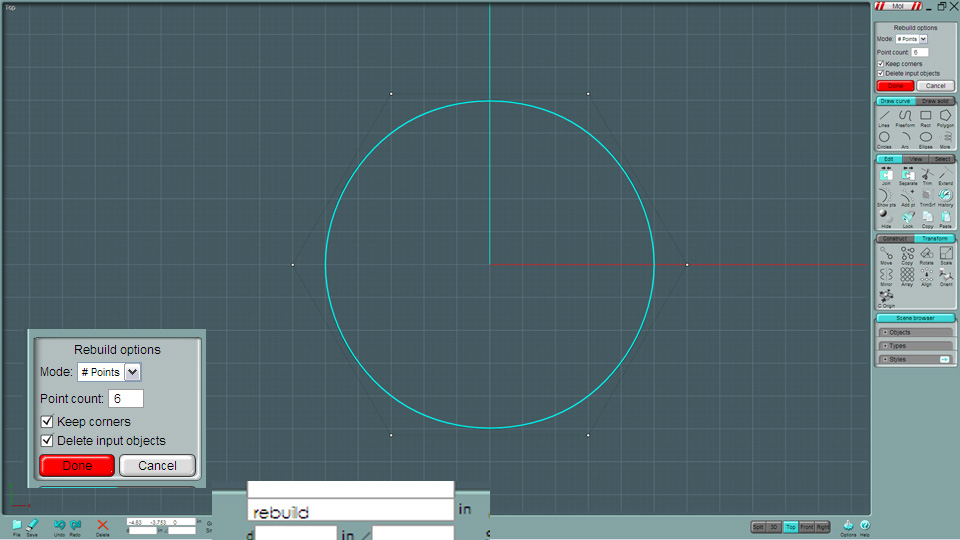
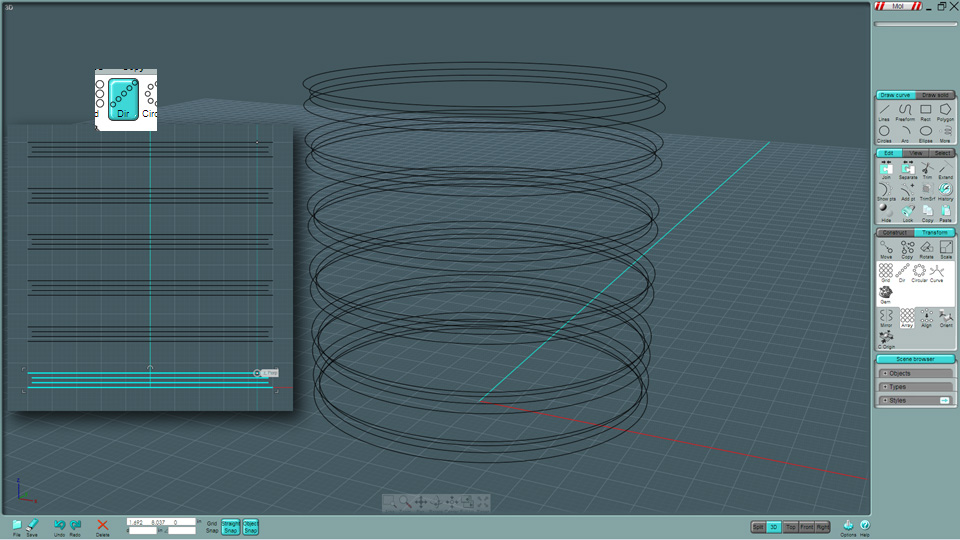
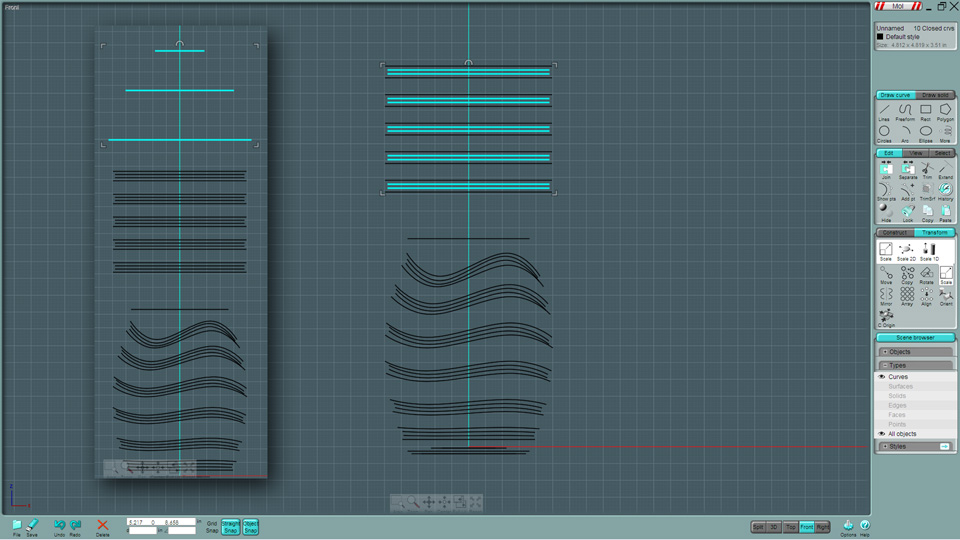
I start off with a simple circle.
A Moi3D circle contains 12 control points by default, but a 6-point version is needed here.
You could simple delete half of the control points, but for the sake of the tutorial, we'll use the Rebuild command.
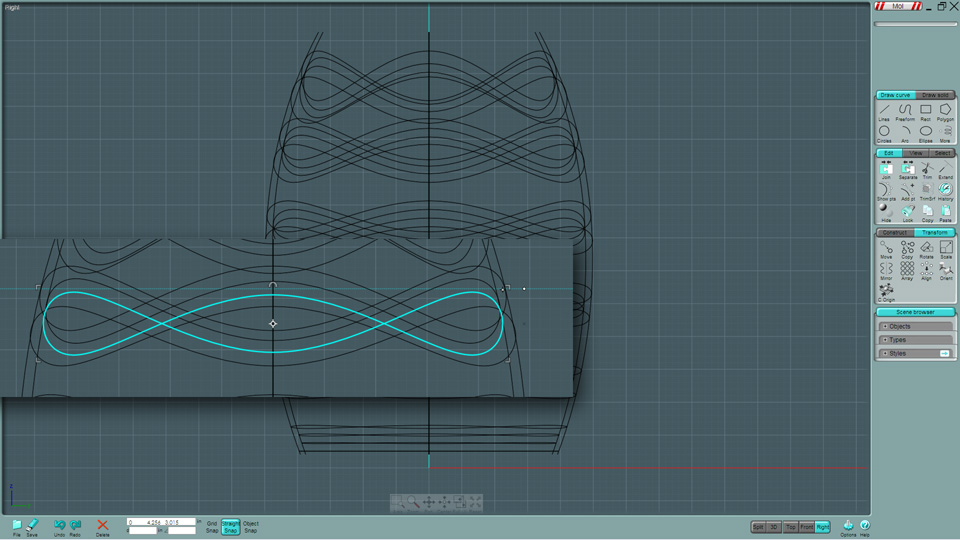
One you create this 6-point circle, copy it with the Array Dir tool and make a four of them.
The two middle ones will create a sunk-in area when lofted - "2D Scale" them in from the top view, do not alter their Z position.
Copy this set as many times as you'd like to create the bottom detail of the bottle, using the Array Dir tool.
I moved the top and bottom set in closer to tweak the look.
What's going on here, you say... There are three "swooping" rises in the ring structure on the bottom of the bottle.
Out of the six stacks of points in the whole array, we need to select three sets, evenly arranged.
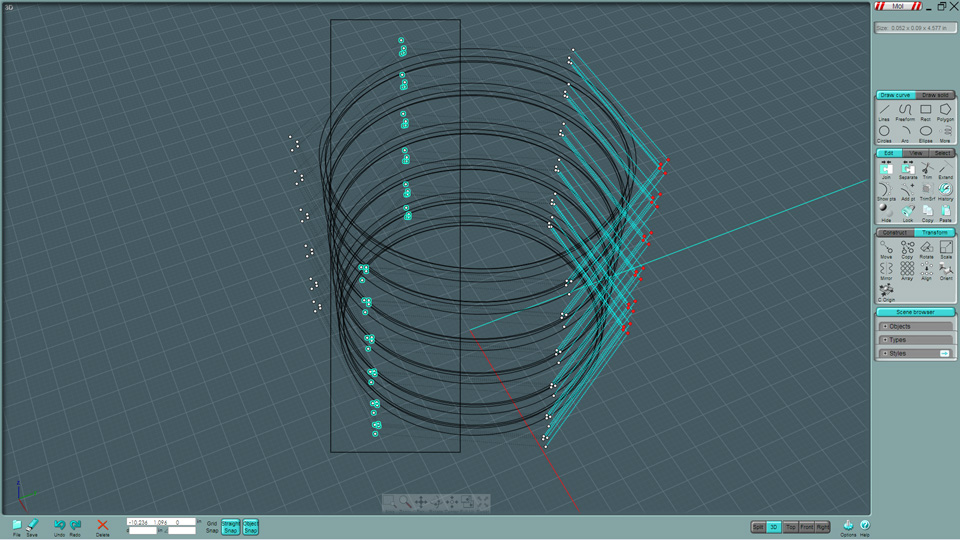
Go to a side view and scale upwards (Z) from the bottom-up.
Ooohs and ahhhs now, please...
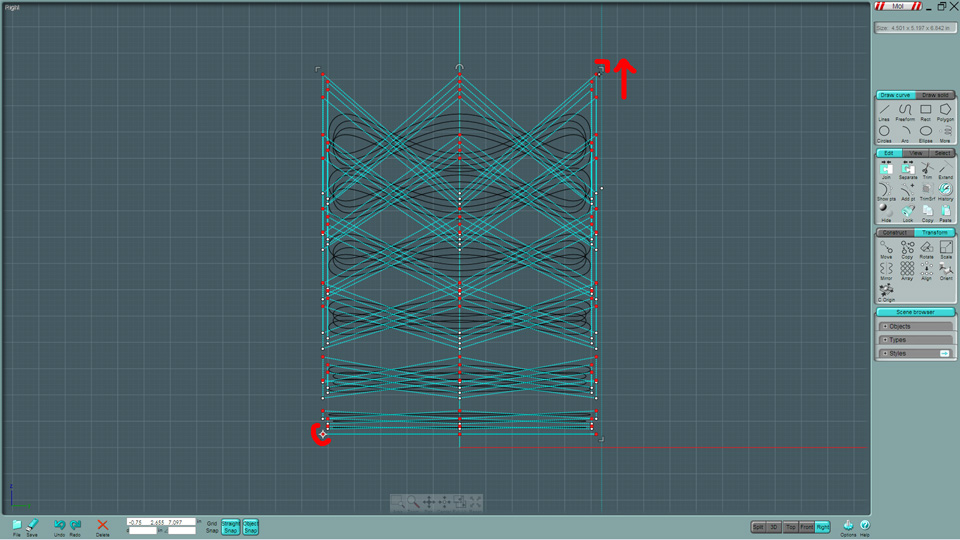
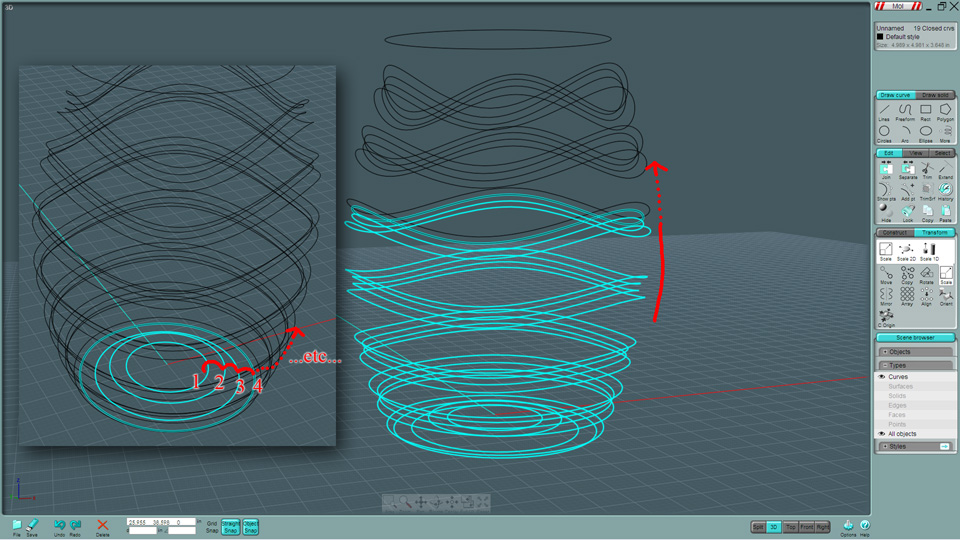
This is the tricky part. The lower half of the bottle has a rounded organic shape.
There are a few ways to make your new fancy ring assemble conform to this shape:
You could revolve or loft the basic shape and Project the rings to the surface.
However, to do so requires that the mode of the projection be set to "Nearest Point" to project the wavy ring to the surface.
If the surface is curved and at an awkward angle, the projected line may not be at the same Z location as its originator.
The second method would be to apply an (FFD) free-form distortion or what is called a "Cage Edit" to the set... those kind of features may be in Moi3D's future, but not here now.
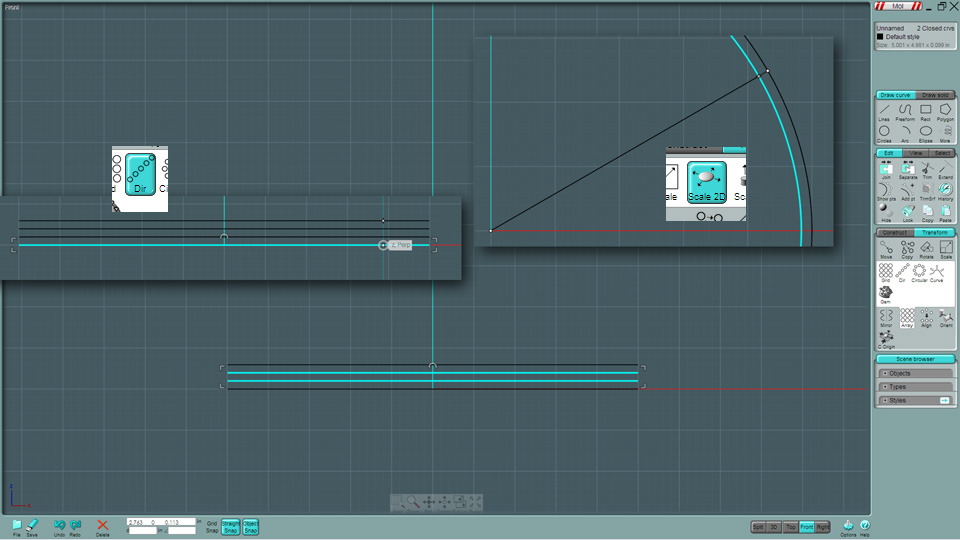
I tackled the solution with a simple method involving scaling down each profile ring in 2D to match some reference curves
(show below) - doing this in each side view. I made a second copy of the reference arc and scaled it in to know where to
place the ends of the sunk-in rings.
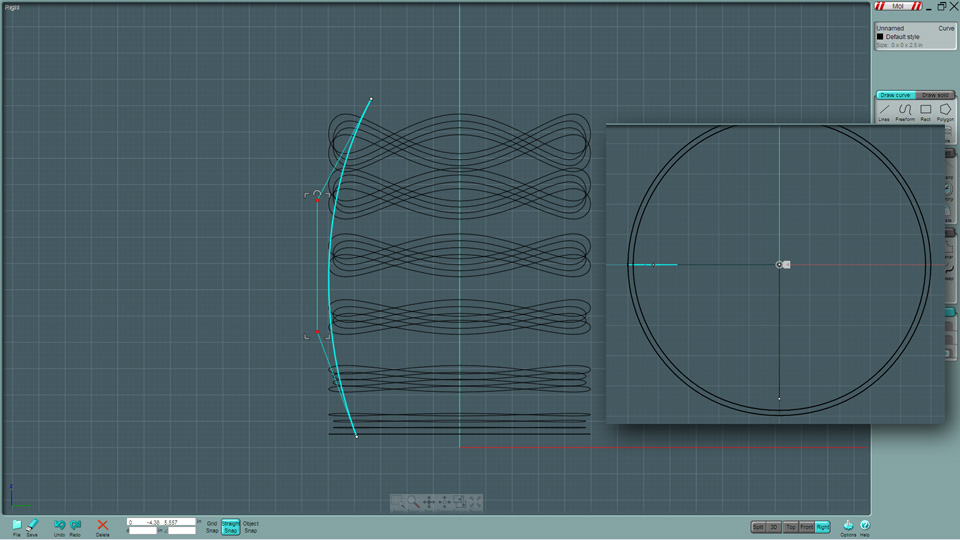
Shown here, 2D scaling each ring. Keep in mind that the wavy rings may need to be adjusted so they don't "fold" over each
other when lofted. This is a done-by-eye procedure.
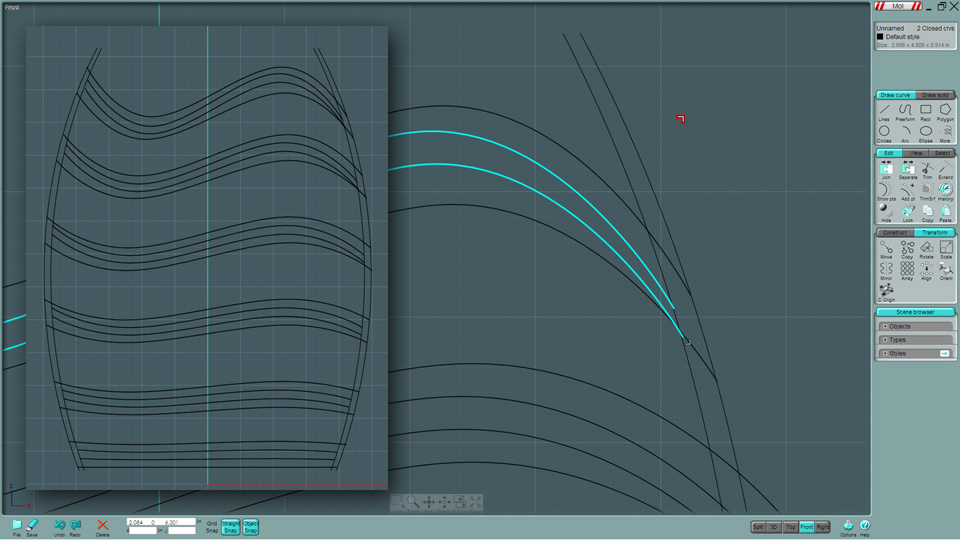
Done from the other view...
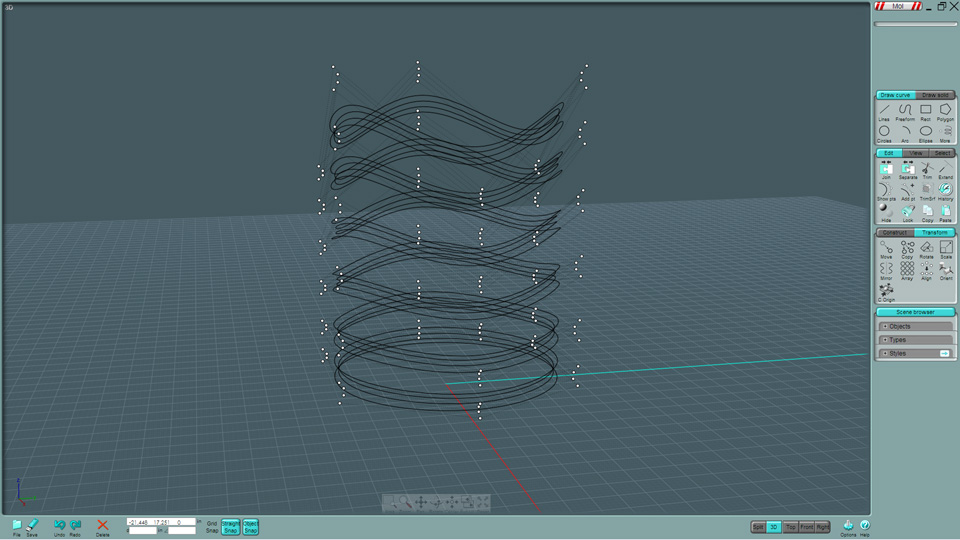
It's starting to take shape...
The rest is easy - take the ring on the bottom (it is still flat) and make arrays and copies of it to fill in the rest of
the bottle's profile.
Lofting is next, and it requires that you choose the order by which to form the mesh.
Manually start at the bottom and work your way around the bottom and up according to the shape you desire.
One click should do it. Note: you have three styles of Lofting; Normal, Loose and Straight.
Straight will make it cut with sharp angles. Normal will match the shape, passing all surfaces through each profile curve.
Loose will average each position - A kin to the way the free-form and spline curves work with where the control points lie.
The loose shape will give you a very fluid shape, but you'll loose detail. I used "Normal"
Once Lofted, vertically scale to suit.
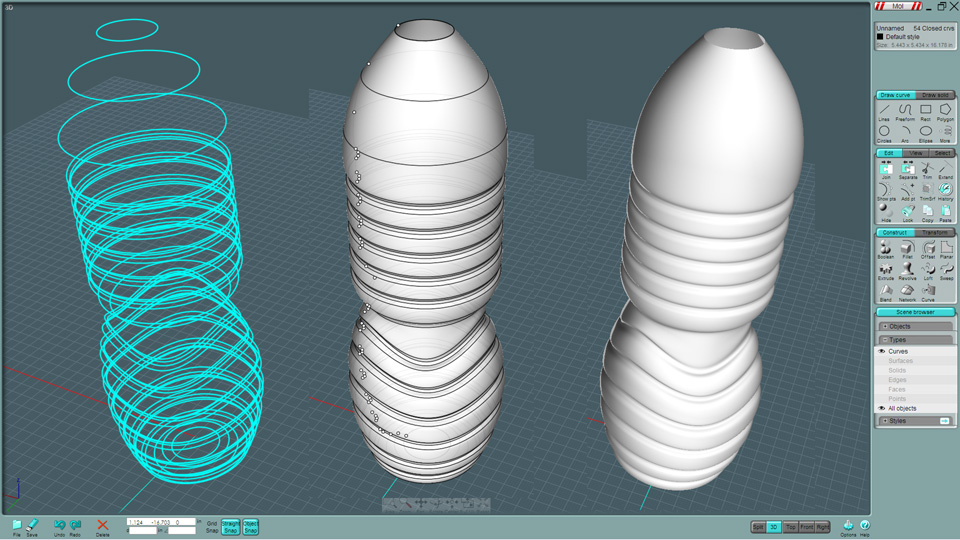
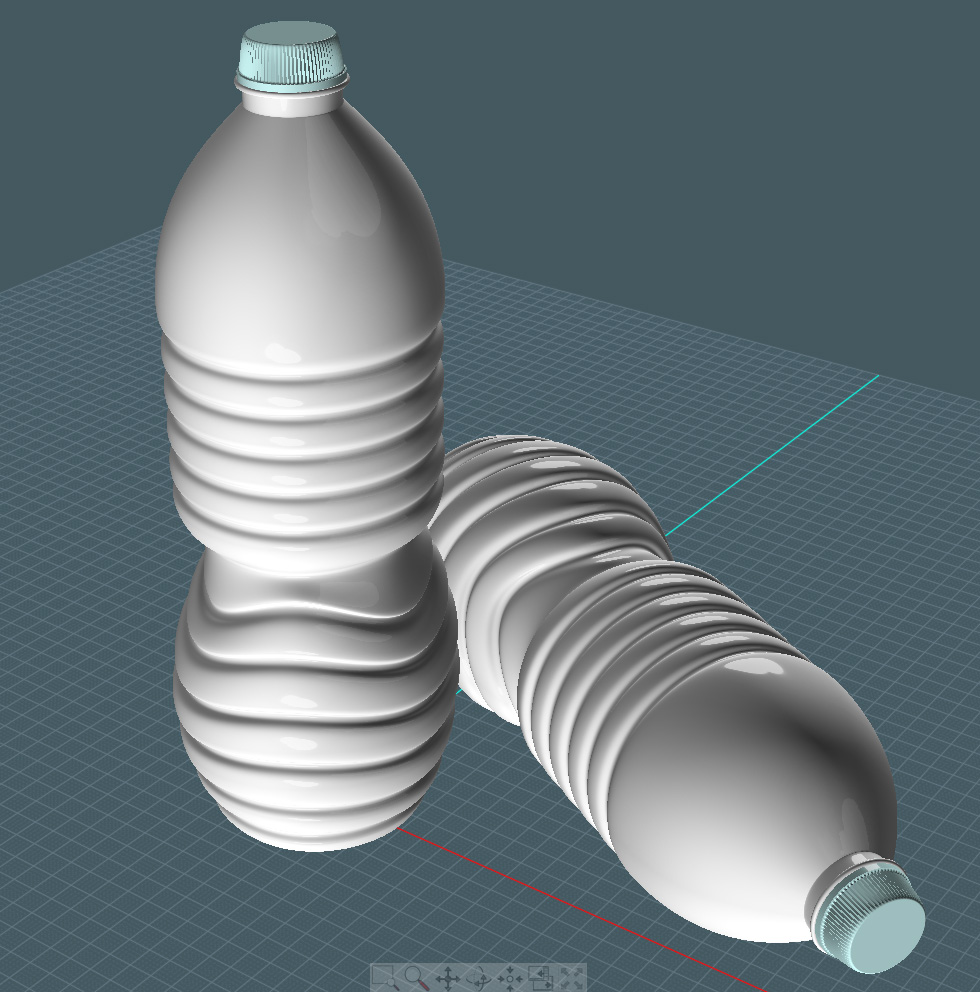
Very professional look...
The added advantage of making the bulk of the shape with a "seamless" mesh surface is that you can add more details later
by trimming and Filleting without very many problems.
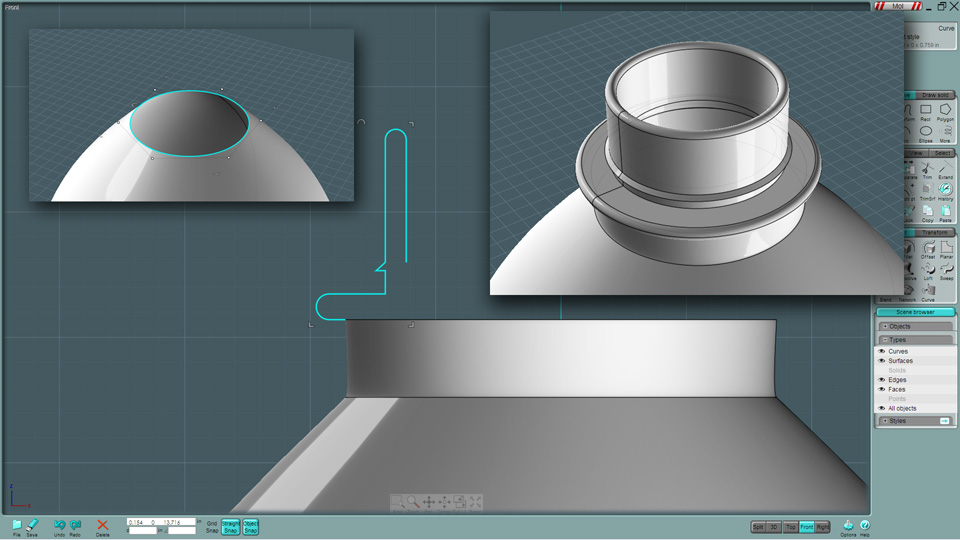
Make the top screw-cap lip. Not that you still have access to the original 6-point circle.
Do a Revolve. Threads can be added if you wish.
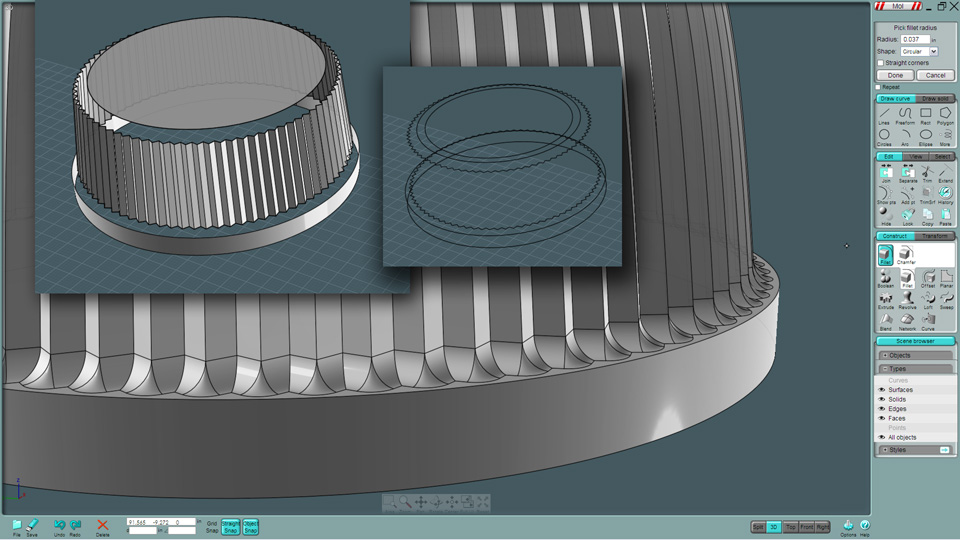
To make the cap, I created and arranged circles and multi-point Custom Stars.
The bottom lip is a simple extrusion, the top was lofted. I Boolean Union-ed the two and tried this nice Fillet to the bottom.
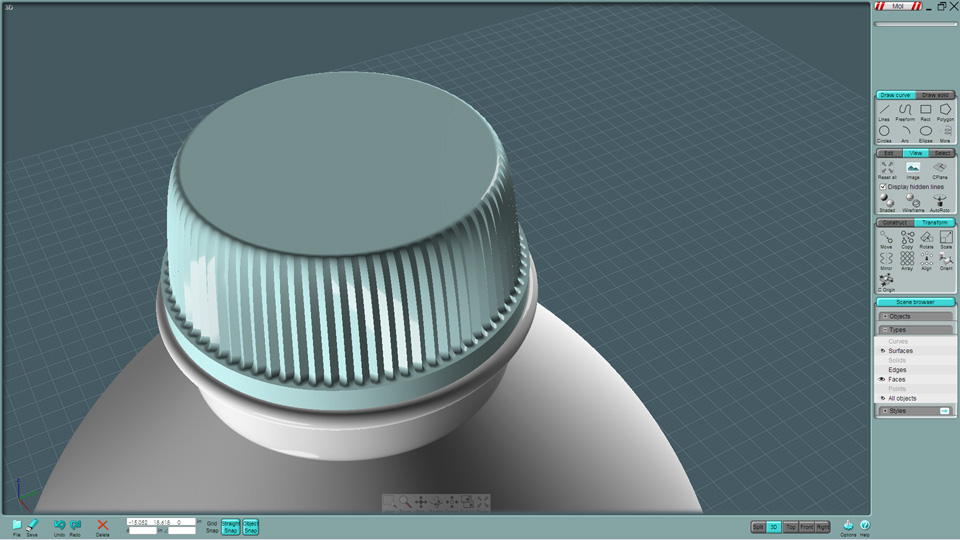
Here you go!
Add and embossed logo, type and recycle symbols using the V3-Beta's new Flow on Surface command...
Render them with a "thin-glass" material set to have the IOR (incident of reflection) of plastic (according to the method that you render), add
water by performing an inset-offset to get a second version of the outside.